

Easy Homemade Honey Buns: The Best Comfort Food
Have you ever faced a kitchen disaster that turned into a cherished memory? Yeah, me too. Once, in the midst of one of those stressed-out weekends where I decided to finally tackle homemade honey buns, I ended up with dough that was more like wallpaper paste than a delicious pastry. After some minor panic — and a few choice expletives — I gathered the misfit dough and turned it into some (very) interesting pancake-like creations. Spoiler alert: they’re not exactly what I had in mind. Yet, somehow, it became a running joke in our household: “Remember that time you tried to make honey buns?” Fast forward a few attempts and a sprinkle of kitchen wisdom, and now I can confidently tell you that these homemade honey buns are my go-to recipe for a cozy, sweet treat that lifts my spirits every single time.
Picture this: it’s a chilly evening, the kind where snuggling under a blanket and sipping hot cocoa sounds perfect. You decide to make something sweet, filling your kitchen with the warm aromas of baking bread and melting butter. As the honey buns rise in the oven (or bubble in the frying pan, if that’s your choice), you can’t help but feel a sense of nostalgia, as the air is filled with that warm, inviting scent. Honestly, it feels like a hug in a bowl!
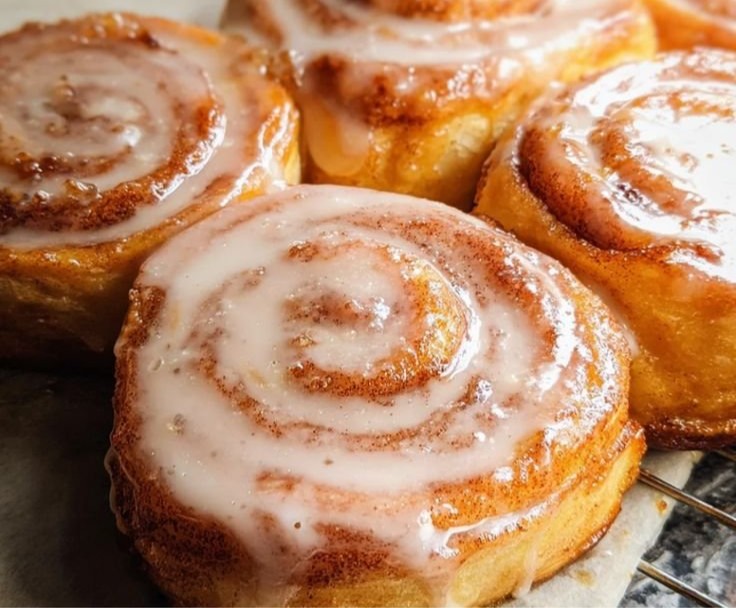
Whether you’re enjoying them fresh from the oven or straight from the frying pan, homemade honey buns are comfort food at its finest—perfectly soft, deliciously sweet, and undeniably comforting.
Why You’ll Love This Recipe
- Easy to Make: Even if you’re a relative newbie in the kitchen, you can whip these up.
- Comforting Treat: Who doesn’t love something warm, gooey, and full of honey?
- Perfect for Leftovers: They keep well and can be reheated easily, which means you can enjoy them more than once.
- Picky-Eater Approved: Trust me; kids (and adults) practically drool over these.
- Great for Meal Prepping: Make a batch ahead, and you’ve got a delightful snack ready for busy days.
- Versatile: You can bake or fry them!
What Makes This Recipe Special?
What sets these honey buns apart is their versatility. You can play around with flavors or even try different toppings beyond the classic honey drizzle. Toss in some cinnamon, add a handful of nuts (if you’re feeling adventurous), or swap out the honey for maple syrup if you’re in the mood for a flavor twist. I still remember the first time I tried a version with cardamom; it blew my mind! The light, fluffy texture pairs so beautifully with the sweetness of honey that it truly makes these buns feel special.
Ingredients
Here’s what you’ll need to create your easy homemade honey buns. Remember, quality matters; opt for fresh ingredients for the best results!
- 2 cups all-purpose flour: This is the foundation of your buns. For bread, always use all-purpose for that perfect chew.
- 1/4 cup sugar: Adds sweetness and helps the yeast bubble.
- 1 packet of active dry yeast: The magic ingredient that makes everything rise!
- 1/2 cup warm milk: It’s best to heat it gently, not too hot, or you’ll kill the yeast. Aim for about 110°F (45°C).
- 1/4 cup melted butter: Because butter makes everything better.
- 1 large egg: Adds richness and helps bind the dough.
- 1/4 teaspoon salt: Just a pinch to elevate all the flavors.
- Honey for drizzling: For that divine sweetness we all crave.
- Oil for frying (if frying): If you choose this method, opt for a neutral oil like canola or vegetable oil.
A little tip: Don’t rush the yeast! If your milk is too hot, you might accidentally end up with some sad, flat buns instead of those lovely puffy ones you’ve been dreaming of.
How to Make It Step-by-Step
Now, let’s get down to the nitty-gritty! Here’s how you can create these delightful honey buns from scratch:
-
Blooming the Yeast:
In a small bowl, combine the warm milk and the yeast. Give it a gentle stir and let it sit for about 5 minutes. You want it to look frothy, like an excited puppy jumping around in a puddle. Just sprinkle that yeast and let it do its thing! -
Mixing the Ingredients:
In a large mixing bowl, combine the flour, sugar, and salt. When the yeast is frothy and bubbly, mix that into the flour mixture. Add the melted butter and the egg. The dough will be a bit shaggy, and that’s okay! Don’t panic. -
Knead Time:
Lightly flour your countertop and dump the dough onto it. Knead the dough for about 5-7 minutes, until it’s smooth and elastic. Honestly, this step is a bit of an arm workout, but it’s 100% worth it. You’ll know it’s ready when it springs back slightly when poked. -
First Rise:
Place the dough in a lightly greased bowl and cover it with a clean kitchen towel. Find a warm spot in your kitchen—near the oven works great—and let it rise until it doubles in size, which usually takes about an hour. This is the time to clean up your kitchen mess or grab a cup of tea! -
Preheat:
If you’re frying, get your oil heating in a pan over medium heat. If baking, preheat your oven to 350°F (175°C). A little tip: these buns can actually be baked or fried, and both methods yield fantastic results. -
Shape Your Buns:
After that beautiful rise, punch the dough down (yup, that’s right, give it a good punch!), and roll it out on a floured surface to about 1/2-inch thickness. Then, cut it into your desired shapes. Traditionally, we make circles, but I’ve done squares, triangles—you name it! Just remember, the more creative you get, the more you will be tempted to convince everyone that you’re a baking wizard. -
Frying or Baking:
- For frying: Carefully place each bun in the hot oil. Fry for about 2-3 minutes on each side until they are golden brown. Do this in batches to not overcrowd the pan.
- For baking: Place your cutouts on a baking sheet lined with parchment paper and simply bake for 12-15 minutes, until they’re golden and delightful.
-
Drizzle with Honey:
Transfer your buns onto a cooling rack or simply a plate (if you’re impatient, like me) and drizzle honey generously over them while they’re still warm. Now, take a moment to appreciate how incredible they look—golden, fluffy, and glistening.
Tips for Best Results
- Don’t skip the kneading: It builds gluten, which is what gives your buns that lovely structure. Take your time!
- Add a touch of cinnamon sugar to your dough for a spiced twist. Absolutely heavenly.
- Test your yeast: Always make sure your yeast is alive and kicking! If it doesn’t foam, it’s time to get a new packet.
Ingredient Substitutions & Variations
This recipe is a blank canvas! Here are some variations to consider:
- Vegan Swap: Swap the butter for coconut oil and the egg for a flax egg (1 tablespoon ground flaxseed mixed with 3 tablespoons water).
- Gluten-Free Option: Use a high-quality gluten-free flour blend—just make sure it contains xanthan gum.
- Flavor Boost: Toss in some chocolate chips or raisins for a delightful surprise.
- Savory Twist: Add herbs or cheese to the dough for a unique honey bun experience—honey and cheese make quite the duo!
Directions
The best pairings for your honey buns are a cup of coffee to wake you up in the morning, a soothing chamomile tea for a cozy evening, or even some melted butter on the side if you’re feeling indulgent. These warm buns, a rom-com playing in the background, and a comfy blanket—now that’s perfection.
How to Store and Reheat Leftovers
If you miraculously have any leftovers (trust me, they’re hard to resist), store them in an airtight container. They’ll stay fresh for about 2-3 days at room temperature. To reheat, pop them in the microwave for about 10 seconds or a toaster oven; this will warm them up and bring back their delightful texture.
Make-Ahead and Freezer Tips
You can make the dough in advance and freeze it after the first rise. Just shape your buns, freeze them on a baking sheet, and then transfer to a zip-top freezer bag after they’re frozen solid. When you want to cook them, just let them rise at room temperature for a couple of hours before baking or frying.
Common Mistakes to Avoid
- Killing the yeast: Make sure your milk isn’t too hot – warm is the key here.
- Skipping the rise: Every minute of rise time counts, giving you those lovely, fluffy buns.
- Overcrowding the pan: If frying, give each bun some space.
Frequently Asked Questions (FAQ)
Q: Can I use whole wheat flour?
A: Sure! Whole wheat flour can be used, but it might make the buns denser. You might want to mix it with all-purpose flour for the best texture.
Q: Can I bake these buns instead of frying?
A: Absolutely! Baking them is a healthier option and still delivers delightful results.
Q: How do I know if my yeast is good?
A: If it foams up when mixed with warm water and sugar, you’re good to go!
Q: Can I freeze these buns?
A: Completely! Freeze after shaping but before cooking, and just thaw and let rise before frying or baking.
Cooking Tools You’ll Need
- Mixing bowls
- Measuring cups and spoons
- Rolling pin
- Baking sheet (for baking method)
- Frying pan (for frying method)
- Cooling rack
Final Thoughts
Homemade honey buns are so much more than just a treat; they’re a way to connect, to reminisce, and to create sweet memories. Whether it’s a Saturday morning filled with laughter and family, or an evening you want to transform into a cozy sanctuary, these buns will be your sidekick. As you experiment with flavors, watch out for new stories that will emerge—cheers to chaotic kitchens, and every ‘oops’ moment that turns into joy!
If you enjoyed this recipe, don’t forget to save it on Pinterest or share it with a friend! Happy baking!

Homemade Honey Buns
Ingredients
Dough Ingredients
- 2 cups all-purpose flour Use all-purpose for that perfect chew.
- 1/4 cup sugar Adds sweetness and helps the yeast bubble.
- 1 packet active dry yeast The magic ingredient that makes everything rise!
- 1/2 cup warm milk Heat gently, about 110°F (45°C).
- 1/4 cup melted butter Because butter makes everything better.
- 1 large egg Adds richness and helps bind the dough.
- 1/4 teaspoon salt Just a pinch to elevate all the flavors.
Cooking Ingredients
- Honey for drizzling For that divine sweetness.
- Oil for frying Use neutral oil like canola or vegetable oil.
Instructions
Blooming the Yeast
- In a small bowl, combine the warm milk and the yeast. Stir gently and let it sit for about 5 minutes until frothy.
Mixing the Ingredients
- In a large bowl, combine flour, sugar, and salt. Once the yeast is frothy, mix it with the flour mixture along with melted butter and the egg.
Knead Time
- Lightly flour your countertop, dump the dough, and knead for about 5-7 minutes until smooth and elastic.
First Rise
- Place the dough in a greased bowl, cover with a towel, and let it rise in a warm spot until doubled in size, about 1 hour.
Preheat
- If frying, heat oil over medium heat. If baking, preheat the oven to 350°F (175°C).
Shape Your Buns
- Punch the dough down, roll it out to about 1/2-inch thickness, and cut into desired shapes.
Frying or Baking
- For frying: Place buns in hot oil, fry for 2-3 minutes per side until golden brown.
- For baking: Place buns on a baking sheet and bake for 12-15 minutes until golden.
Drizzle with Honey
- Transfer buns to a cooling rack, drizzle with honey while warm, and enjoy!


